Showing posts with label arts and crafts. Show all posts

7.27.2014

Learning the Art of Bento Making


ENRICH is my word of the year. I am taking small steps to make sure I fulfill this goal/vision I set for myself for 2014. So, when I heard that the Bento Mommas are going down South, I immediately signed up for a crafty afternoon adventure.

I'm a work-in-progress mom (aren't we all?) and lately, I've been getting more creative in putting together my son's baon. A picky eater, he is not. It's just so terribly fulfilling and fun for me when my son says I make the coolest baon.

For a minimal workshop fee, we get to use and bring home the most essential bento stuff. Glad Kitchen provided another bagful of freebies for all the participants to take home.


I love freebies! We took home products from Glad Kitchen. Very useful stuff, indeed.

It's a very small class, and I thank our host MommanManila, for welcoming me and my son in their lovely home. You see, I didn't know anyone there, I just signed up and showed up in my desire to learn.


The Bento Mommas prepping for the afternoon

Bento Momma Kaye in action


With the Glad products, and the nifty tools in our starter kit, we were taught how to shape the rice. This is probably the only time when playing with your food isn't just allowed, it's actually encouraged.


My creation looked so promising =)

My son took a break from all the running and playing with the other kids to check up on his mom.

My 6 year old probably thinking what creature his mom created

My creation was cute until I started decorating the face.

 
We made a rabbit.  A scary one here, in my attempt to make it errr, cute. But hey, it is something I made and now I know how to shape and mold the rice, the monsters  shapes I can create are endless!


My 2nd bento creation turned out so much better! This is my bear-y nice sandwich!


After the session, we exchanged stories over merienda. Concentrating for more than two hours, even if I was putting grapes, and chicken and kiwi inside my mouth from time to time, will make you hungry. Good thing there's pasta from Mish and chicken from Marky's.The chicken was so crunchy I'm sure this is going to be something I can include in my son's lunchbox that he'll absolutely love.


And we shopped, too! What a complete experience! My son was so happy that the Star Wars set was available there. It's almost always out of stock at their online shop.


Thank you to the #Crafternoon group for  this workshop. Nice meeting you, MommanManila (not in photo) and MrsPCuyugan (right)!


The class picture


Photo credit to MommanManila


8.19.2013

Freezer Paper DIY Tshirt Stencil

There will be many more "I can't believe I haven't posted this yet!" as I really have bene remiss in blogging. Aside from not finding enough time, I seem to be to tired to even open the computer to start writing.


But this raining ( and flody) Monday, inspiration struck and here I am hoping to catch up on almost half a year of delinquent posts. Like this.

I believe we did this last January.


Prior to my Instagram addiction, I was quite hooked on Pinterest. Before Pinterest, I never even knew there was such a thing as freezer paper. I know foil, sure. But freezer paper? Until more and more DIY crafts appeared on Pinterest and it got me really intrigued in trying this out.


Thankfully, I got hold of a roll last December and here's our first project. Our first-ever freezer paper stenciled shirt.


You'll need:
- Paint
-brush
-your chosen design
-freezer paper
-cutter
-plain shirt


I chose a fairly simple one: a whale! Drew by free hand and cut it out quite easily. You should then iron the shiny side on the shirt and make sure it is fairly secure.


The next job is the easiest and most fun. Just start painting.


Before the paint fully dries, peel off the freezer paper. Let the paint dry completely.


And here's our tshirt made with love. You can iron over the print again to make sure it stays put. Ours did not fade or run even after several washings.


This post is really late because the boy has outgrown the shirt several months back. Won't fit him so maybe it's time for another DIY project.


4.20.2013

Easter Egg Making

Last Black Saturday, we made our very own eggs!


If you have, use gel food color instead of the liquid color. The colors came out much brighter.  I filled 3 plastic cups with hot water, added a few drops of the gel color (we used the Americolor brand), added a tablespoon of vinegar and waited.

In a few minutes, our eggs were ready!


Presenting the three eggs.


Creativity flows. It turned out to be a fun and colorful weekend for us.


1.15.2013

Upcycle your Boxes and Create toys

Tech toys are restricted at our house in general.

Last year, the boy discovered the joys of playing games on the Ipad and cellphone and while our educational games outnumber the likes of Angry Birds by about 3:1, I have this fear he’ll grow up not knowing there are other ways to play. Specifically, other more enjoyable ways to play. So we've restricted the use of this tech toy. He does get a little play time on Saturdays.

I usually get a  "please , mommy just for 5 minutes" plea every now and then, but he usually follows. One time his dad have him a cellphone to play with on a Tuesday, he said "no dad, it's not a Saturday", and gave back the little toy to a flustered daddy.

 Probably because I have hand-eye coordination problems, or was just too impatient, I never really liked the family computer or the game and watch. It’s easy for me to say to Jared to follow mom because I can lead by example (ehem, ehem daddy it’s not you I was pertaining to).


So, what do we do and how do we keep this boy happy and occupied? We use of our hands and create. I've been trying to document the activities we usually do every weekend in the hopes I can refer to this when we have another child, and to show Jared he had a fun childhood =)

So, here's our exciting ways to upcycle a box.

Turn it to an airplane


Or, have tennis balls or a marble race with this -- I don't know how to call this


The above toys gave him hours of pure joy!


10.01.2012

An Afternoon of Art


After the hectic day that was Saturday, the troop turned in as early as 7:30 a.m. and woke up refreshed 11 hours later.

We needed to tackle a lot of cleaning, loads of clothes of wash but the cool weather cooperated and we were done with chores at 10, just in time to cook our favorite weekend lunch of sinigang na hipon and fried galunggong.

By afternoon, we tackled a more enjoyable task: our arts and crafts.

Little boy found fabric crayons in his room, we got an old white shirt and drew our artwork.


It was a collaboration: mommy drew the sun, clouds and sea, daddy the tree, and Jared those little shapes he called traffic cones.


I was also prodded to do another masterpiece in his sando: don't laugh but this is my dragon.

After stopping at 2 shirts, the little boy went on his own businesses and opened one of the doctor sets I brought as gifts (done with my Christmas shopping-- a record for me) and played the serious doc.


7.27.2012

Eraser Painting

Saturday is officially our arts and crafts day. I usually come prepared with materials from my stash, and interesting activities we can do, mostly from Pinterest.

This is another pinterest inspired craft.

I was feeling particularly lazy but can I resist the "pyease mom, arts n crafts" look from my boy?  Of course... not. =)

I hurriedly open my pink and yellow filing cabinets (more on that on future posts) and it yielded a canvas, some paint and a pencil, the 3 things we need for this craft.

Show him once what to do, and let him fill the canvass with paint. Dot, dot, dot he goes with the eraser. Will also work well with stamp pads instead of paint.

This is my work area at home, which I have yet to photograph properly and blog here.

He was quiet and occupied for about 15 minutes. Enough time for mommy to check quickly check FB and Pinterest.

I should start displaying his artwork in his room one of these days. The collection is growing.


7.03.2012

Welcome, July! Hello, Picasso!

The first of July had us on house arrest, the daddy is down with cough for the past two weeks and had been advised to rest.

My itchy feet have to be kept in check and we were bored for a while. That is until we started our Sunday Arts and Crafts day!

Really, this weekend planning of activities take up some time because our boy likes having activities one after the other. Of course, I would not deny him that as long as my energy and my stash of supplies permit.

With our big canvass, some paint, my new paintbrushes and a roll of kraft paper in place, we got down to business.

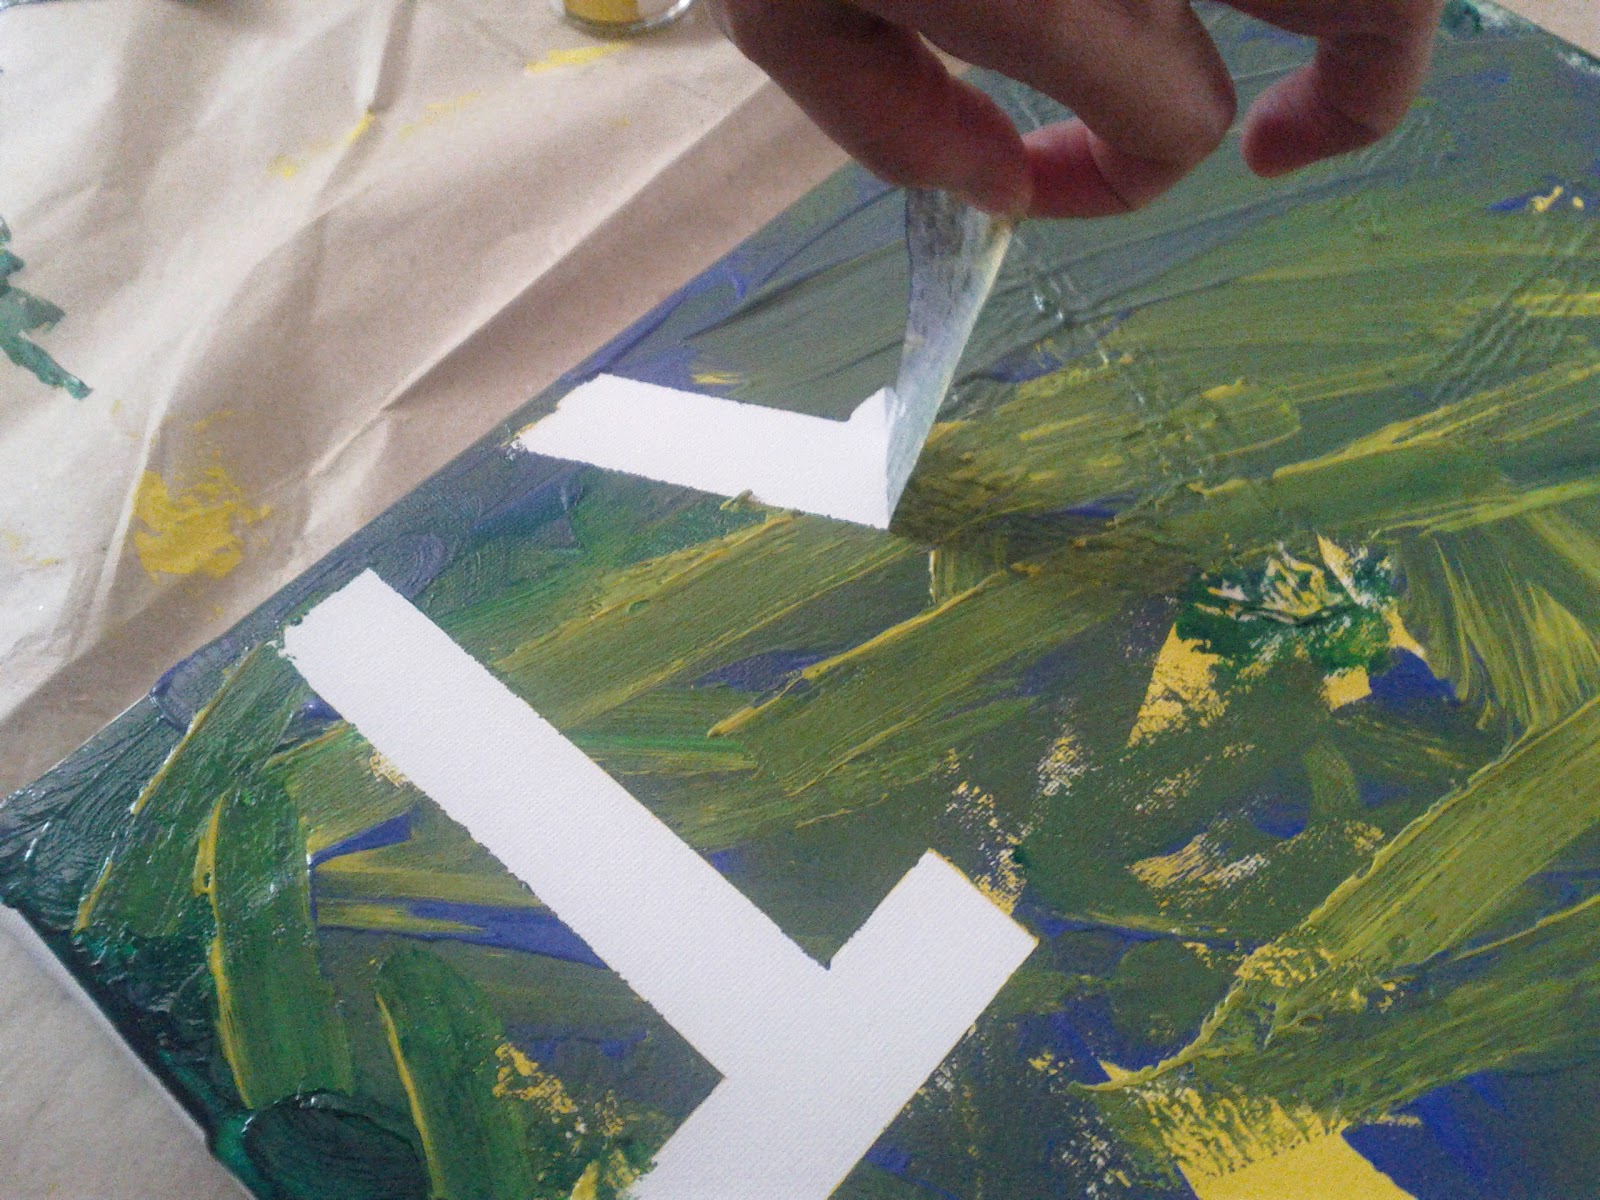
Before I handed him the canvass, I made the letters E-A-T using masking tape. So the little boy just had to splash and play with paint.

And paint he did...


It was also my filing day at home so excuse the mess in the background.


Note to self: buy big tubs of paint. This yellow tub was out in no time and we used blue and green instead. Hmm, off the plan as I wanted this to go up our dining room wall (need something in yellow).

I have to find my digicam. My phonecam pics are getting worse.

The masterpiece.

Then, with the tip of a knife, slowly pell off the masking tape. Make sure you do this while the paint is still wet, for more crisp lines.

And we have a masterpiece!

2.23.2012

Arts and Crafts: Salt Dough Ornaments

Our usual weekend crafts are simple and requires materials you might already have in your cupboard. This one is easy, but messy.

Nevertheless, it was an afternoon filled with flour, messy and one happy kid.

Our salt dough ornaments are still unpainted as I type this, more than a month after we made them. Once we perfect this, we'll have our own personalized tree ornaments for 2012.

So looking forward to that.

Prepare all the materials and ingredients: salt, flour, water, stamps and mixing tools

These big plastic letters in my craft box came in handy, as well as these love-themed stamps

Mix everthing together

Knead and knead. This is the part the little boy enjoyed the most. It was the most messy part!

Then, roll with a pin or a bottle and cut into circles

Stamp, mold to your heart's desire

Get a chopstiick and poke a hole. Make sure it goes all the way through.


Tadah! All ready to bake in the oven!


Related Posts Plugin for WordPress, Blogger...
Pin It button on image hover